 zhangtao
d50dd9dd1e
zhangtao
d50dd9dd1e
refactor: 重构前端组件和样式,添加AI助手功能

docs: 更新README文档,添加ruff代码检查说明

feat: 新增AI助手相关API和前端组件

chore: 更新.gitignore文件,添加ruff缓存配置

fix: 修复前端布局和设置相关的问题

perf: 优化代码结构和性能,移除冗余代码

test: 更新测试文件,移除编码声明

build: 更新依赖版本,调整requirements.txt
22 KiB

FastApiAdmin 
Modern Full-Stack Rapid Development Platform
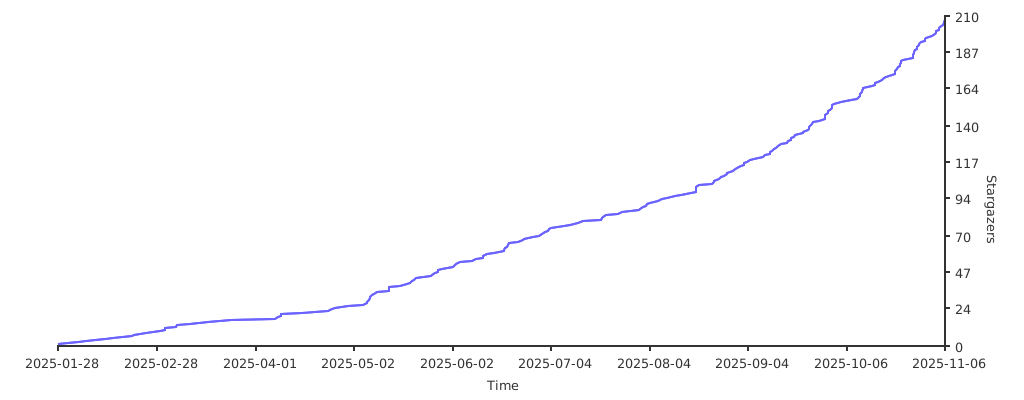
If you like this project, please give it a ⭐️ to show your support!


English | 简体中文
📘 Project Introduction
FastApiAdmin is a completely open-source, highly modular, and technologically advanced modern rapid development platform designed to help developers efficiently build high-quality enterprise-level backend and frontend systems. This project adopts a frontend-backend separation architecture, integrating the Python backend framework FastAPI and the mainstream frontend framework Vue3 to achieve unified development across multiple terminals, providing a one-stop out-of-the-box development experience.
Design Philosophy: With modularity and loose coupling at its core, it pursues rich functional modules, simple and easy-to-use interfaces, detailed development documentation, and convenient maintenance methods. By unifying frameworks and components, it reduces the cost of technology selection, follows development specifications and design patterns, builds a powerful code hierarchical model, and comes with comprehensive local language support. It is specifically tailored for team and enterprise development scenarios.
🔗 Source Repositories
| Platform | Repository |
|---|---|
| GitHub | FastapiAdmin Main | FastDocs Website | FastApp Mobile |
| Gitee | FastapiAdmin Main | FastDocs Website | FastApp Mobile |
🎯 Core Advantages
| Advantage | Description |
|---|---|
| 🔥 Modern Tech Stack | Built with cutting-edge technologies like FastAPI + Vue3 + TypeScript |
| ⚡ High Performance | Leveraging FastAPI's asynchronous features and Redis caching for optimized response speed |
| 🔐 Secure & Reliable | JWT + OAuth2 authentication mechanism with RBAC permission control model |
| 🧱 Modular Design | Highly decoupled system architecture for easy expansion and maintenance |
| 🌐 Full-Stack Support | Integrated solution for Web + Mobile(H5) + Backend |
| 🚀 Rapid Deployment | One-click Docker deployment for quick production rollout |
| 📖 Comprehensive Docs | Detailed documentation and tutorials to reduce learning curve |
📦 Engineering Structure Overview
FastapiAdmin
├─ backend               # Backend project (FastAPI + Python)
├─ frontend              # Web frontend project (Vue3 + Element Plus)
├─ fastapp               # Mobile project (UniApp + Wot Design Uni)
├─ fastdocs              # Documentation project (VitePress)
├─ devops                # Deployment configurations
├─ docker-compose.yaml   # Docker orchestration file
├─ deploy.sh             # One-click deployment script
├─ LICENSE               # Open source license
|─ README.en.md          # English documentation
└─ README.md             # Chinese documentation
🛠️ Technology Stack Overview
| Type | Technology Selection | Description |
|---|---|---|
| Backend Framework | FastAPI / Uvicorn / Pydantic 2.0 / Alembic | Modern, high-performance asynchronous framework with mandatory type constraints and data migration capabilities |
| ORM | SQLAlchemy 2.0 | Powerful ORM library |
| Scheduled Tasks | APScheduler | Easily implement scheduled tasks |
| Authentication | PyJWT | Implement JWT authentication |
| Frontend Framework | Vue3 / Vite5 / Pinia / TypeScript | Rapidly develop Vue3 applications |
| Web UI | ElementPlus | Enterprise-level UI component library |
| Mobile | UniApp / Wot Design Uni | Cross-platform mobile application framework |
| Database | MySQL / MongoDB | Support for relational and document databases |
| Cache | Redis | High-performance cache database |
| Documentation | Swagger / Redoc | Automatically generate API documentation |
| Deployment | Docker / Nginx / Docker Compose | Containerized deployment solution |
📌 Built-in Functional Modules
| Module | Features | Description |
|---|---|---|
| 📊 Dashboard | Workbench, Analysis Page | System overview and data analysis |
| ⚙️ System Management | Users, Roles, Menus, Departments, Positions, Dictionaries, Configurations, Announcements | Core system management functions |
| 👀 Monitoring | Online Users, Server Monitoring, Cache Monitoring | System runtime status monitoring |
| 📋 Task Management | Scheduled Tasks | Asynchronous task scheduling management |
| 📝 Log Management | Operation Logs | User behavior auditing |
| 🧰 Development Tools | Code Generation, Form Builder, API Documentation | Tools to enhance development efficiency |
| 📁 File Management | File Storage | Unified file management |
🍪 Demo Environment
- 🌐 Official Website: https://service.fastapiadmin.com
- 💻 Web Demo: https://service.fastapiadmin.com/web
- 📱 Mobile: https://service.fastapiadmin.com/app
- 👤 Login Account:
adminPassword:123456
🚀 Quick Start
Environment Requirements
| Type | Technology Stack | Version |
|---|---|---|
| Backend | Python | 3.12 ≥ 3.10 |
| Backend | FastAPI | 0.109+ |
| Frontend | Node.js | ≥ 20.0 |
| Frontend | Vue3 | 3.3+ |
| Database | MySQL | 8.0+ |
| Cache | Redis | 7.0+ |
Get the Code
# Clone the repository to your local machine
git clone https://gitee.com/tao__tao/FastapiAdmin.git
# Or
git clone https://github.com/1014TaoTao/FastapiAdmin.git
Backend Note: After cloning the code, you need to rename the
.env.dev.examplefile in thebackend/envdirectory to.env.dev, and rename the.env.prod.examplefile in thebackend/envdirectory to.env.prod. Then modify the database connection information, Redis connection information, etc., according to the actual situation. Frontend Note: After cloning the code, you need to rename the.env.development.examplefile in thefrontenddirectory to.env.development, and rename the.env.production.examplefile in thefrontenddirectory to.env.production. Then modify the interface address, etc., according to the actual situation.
Backend Setup
# Navigate to the backend directory
cd backend

# Install dependencies
pip3 install -r requirements.txt

# Start the backend service: ensure that MySQL and Redis are running
python main.py run
# Or specify environment
python main.py run --env=dev

# Generate migration files
python main.py revision --env=dev
# Apply migrations
python main.py upgrade --env=dev
Frontend Setup
# Navigate to the frontend directory
cd frontend

# Install dependencies
pnpm install

# Start the development server
pnpm run dev

# Build for production
pnpm run build
Mobile Setup
# Navigate to the mobile directory
cd fastapp

# Install dependencies
pnpm install

# Start the H5 development server
pnpm run dev:h5

# Build for H5 production
pnpm run build:h5
Documentation Setup
# Navigate to the documentation directory
cd fastdocs

# Install dependencies
pnpm install

# Start the documentation development server
pnpm run docs:dev

# Build documentation for production
pnpm run docs:build
Access URLs
- 🏠 Official Website: http://localhost:5180
- 🖥️ Web Interface: http://localhost:5180/web
- 📱 Mobile Interface: http://localhost:5180/app
Default accounts:
- Admin:
admin/123456
🐳 Docker Deployment
# Copy the deployment script to the server and grant execution permissions
chmod +x deploy.sh

# Execute one-click deployment
./deploy.sh

# Common Docker commands
# View running containers
docker compose ps

# View container logs
docker logs -f <container_name>

# Stop services
docker compose down
🔧 Models
| Module | Screenshot |
|---|---|
| Dashboard |  |
| Generator |  |
| AI |  |
Mobile
| Login | Home | Profile |
|---|---|---|
 |
 |
 |
🛠️ Secondary Development Tutorial
Backend Development
The project adopts a plugin-based architecture design, and it is recommended to carry out secondary development in the backend/app/plugin directory. The system will automatically discover and register all routes that meet the specifications, facilitating module management and upgrade maintenance.
Plugin Architecture Features
- Automatic Route Discovery: The system automatically scans all
controller.pyfiles in thebackend/app/plugin/directory - Automatic Route Registration: All routes are automatically registered to the corresponding prefix path (module_xxx -> /xxx)
- Modular Management: Code is organized by functional modules for easy maintenance and extension
- Support for Multi-level Nesting: Support for multi-level nested structures within modules
Plugin Directory Structure
backend/app/plugin/
├── module_application/  # Application module (automatically mapped to /application)
│   └── ai/              # AI submodule
│       ├── controller.py # Controller file
│       ├── model.py      # Data model file
│       ├── schema.py     # Data validation file
│       ├── service.py    # Business logic file
│       └── crud.py       # Data access file
├── module_example/      # Example module (automatically mapped to /example)
│   └── demo/            # Submodule
│       ├── controller.py # Controller file
│       ├── model.py      # Data model file
│       ├── schema.py     # Data validation file
│       ├── service.py    # Business logic file
│       └── crud.py       # Data access file
├── module_generator/    # Code generation module (automatically mapped to /generator)
└── init_app.py          # Plugin initialization file
Automatic Route Registration Mechanism
The system will automatically discover and register all routes that meet the following conditions:
- Controller files must be named
controller.py - Routes are automatically mapped:
module_xxx->/xxx - Support for multiple
APIRouterinstances - Automatic route deduplication
Secondary Development Steps
- Create Plugin Module: Create a new module directory under
backend/app/plugin/, such asmodule_yourfeature - Write Data Model: Define database models in
model.py - Write Data Validation: Define data validation models in
schema.py - Write Data Access Layer: Write database operation logic in
crud.py - Write Business Logic Layer: Write business logic in
service.py - Write Controller: Define routes and handling functions in
controller.py - Automatic Registration: The system automatically scans and registers all routes, no manual configuration required
Controller Example
# backend/app/plugin/module_yourfeature/yourcontroller/controller.py
from fastapi import APIRouter, Depends, Path
from fastapi.responses import JSONResponse

from app.common.response import SuccessResponse
from app.core.router_class import OperationLogRoute
from app.core.dependencies import AuthPermission
from app.api.v1.module_system.auth.schema import AuthSchema
from .service import YourFeatureService

# Create route instance
YourFeatureRouter = APIRouter(
    route_class=OperationLogRoute,
    prefix="/yourcontroller",
    tags=["Your Feature Module"]
)

@YourFeatureRouter.get("/detail/{id}", summary="Get Detail")
async def get_detail(
    id: int = Path(..., description="Feature ID"),
    auth: AuthSchema = Depends(AuthPermission(["module_yourfeature:yourcontroller:detail"]))
) -> JSONResponse:
    """
    Get feature detail

    Parameters:
    - id (int): Feature ID
    - auth (AuthSchema): Authentication information model

    Returns:
    - JSONResponse: JSON response containing feature detail
    """
    result = await YourFeatureService.detail_service(id=id, auth=auth)
    return SuccessResponse(data=result)

@YourFeatureRouter.get("/list", summary="Get List")
async def get_list(
    auth: AuthSchema = Depends(AuthPermission(["module_yourfeature:yourcontroller:list"]))
) -> JSONResponse:
    """
    Get feature list

    Parameters:
    - auth (AuthSchema): Authentication information model

    Returns:
    - JSONResponse: JSON response containing feature list
    """
    result = await YourFeatureService.list_service(auth=auth)
    return SuccessResponse(data=result)
Development Specifications
- Naming Convention: Module names use
module_xxxformat, controller names use camelCase naming - Permission Control: All API interfaces must add permission control decorators
- Log Recording: Use
OperationLogRouteclass to automatically record operation logs - Return Format: Use
SuccessResponseorErrorResponseuniformly for responses - Code Comments: Add detailed docstrings for all API interfaces
Notes
- Plugin module names must start with
module_ - Controller files must be named
controller.py - Routes are automatically mapped to corresponding prefix paths
- No manual route registration required, the system automatically discovers and registers
Frontend Part
- Configure Frontend API: Create corresponding API files in
frontend/src/api/directory - Write Page Components: Create page components in
frontend/src/views/directory - Register Routes: Register routes in
frontend/src/router/index.ts
Mobile Part
- Configure Mobile API: Create corresponding API files in
fastapp/src/api/directory - Write Page Components: Create page components in
fastapp/src/pages/directory - Register Routes: Register routes in
fastapp/src/router/index.ts
Code Generator Usage
The project has a built-in code generator that can automatically generate front-end and back-end code based on database table structures, greatly improving development efficiency.
Generation Steps
- Login System: Login to the system using an administrator account
- Enter Code Generation Module: Click "Code Generation" in the left menu
- Import Table Structure: Select the database table to generate code for
- Configure Generation Parameters: Fill in module name, function name, etc.
- Generate Code: Click the "Generate Code" button
- Download or Write: Choose to download the code package or write directly to the project directory
Generated File Structure
# Backend files
backend/app/plugin/module_yourmodule/
└── yourfeature/
    ├── controller.py # Controller file
    ├── model.py      # Data model file
    ├── schema.py     # Data validation file
    ├── service.py    # Business logic file
    └── crud.py       # Data access file

# Frontend files
frontend/src/
├── api/module_yourmodule/
│   └── yourfeature.ts # API call file
└── views/module_yourmodule/
    └── yourfeature/
        └── index.vue # Page component
Generated Code Example
# Generated controller code example
from fastapi import APIRouter, Depends
from fastapi.responses import JSONResponse

from app.common.response import SuccessResponse
from app.core.router_class import OperationLogRoute
from app.core.dependencies import AuthPermission
from app.api.v1.module_system.auth.schema import AuthSchema
from .service import YourFeatureService
from .schema import (
    YourFeatureCreateSchema,
    YourFeatureUpdateSchema,
    YourFeatureQueryParam
)

YourFeatureRouter = APIRouter(
    route_class=OperationLogRoute,
    prefix="/yourfeature",
    tags=["Your Feature Module"]
)

@YourFeatureRouter.get("/detail/{id}")
async def get_detail(
    id: int,
    auth: AuthSchema = Depends(AuthPermission(["module_yourmodule:yourfeature:detail"]))
) -> JSONResponse:
    result = await YourFeatureService.detail_service(id=id, auth=auth)
    return SuccessResponse(data=result)
Development Tools
- Code Generator: Automatically generate front-end and back-end CRUD code
- API Documentation: Automatically generate Swagger/Redoc API documentation
- Database Migration: Support for Alembic database migration
- Log System: Built-in log recording and query functions
- Monitoring System: Built-in server monitoring and cache monitoring functions
Development Process
- Requirement Analysis: Clarify functional requirements and business logic
- Database Design: Design database table structure
- Code Generation: Use code generator to generate basic code
- Business Logic Development: Perfect business logic and interfaces
- Frontend Development: Develop frontend pages and interactions
- Testing: Conduct unit testing and integration testing
- Deployment: Deploy to production environment
Development Notes
- Permission Control: All API interfaces must add permission control
- Data Validation: All input data must be validated
- Exception Handling: Uniformly handle API exceptions
- Log Recording: Key operations must be logged
- Performance Optimization: Pay attention to API performance optimization, avoid slow queries
- Code Specification: Follow PEP8 and project code specifications
Deployment Instructions
Local Development
# Start backend service
cd backend
python main.py run --env=dev

# Start frontend service
cd frontend
pnpm run dev

# Start mobile service
cd fastapp
pnpm run dev:h5
Docker Deployment
# Execute one-click deployment script
./deploy.sh

# View running status
docker compose ps

# View logs
docker logs -f <container_name>
Technical Support
- Official Documentation: https://service.fastapiadmin.com
- GitHub: https://github.com/1014TaoTao/FastapiAdmin
- Gitee: https://gitee.com/tao__tao/FastapiAdmin
Common Questions
Q: How to add a new functional module?
A: Follow the secondary development steps, create a new module directory under backend/app/plugin/ directory, and write related code.
Q: How to configure the database?
A: Configure database connection information in backend/env/.env.dev or backend/env/.env.prod files.
Q: How to configure Redis?
A: Configure Redis connection information in backend/env/.env.dev or backend/env/.env.prod files.
Q: How to generate database migration files?
A: Use the command python main.py revision --env=dev to generate migration files.
Q: How to apply database migrations?
A: Use the command python main.py upgrade --env=dev to apply migrations.
Q: How to start the development server?
A: Use the command python main.py run --env=dev to start the development server.
Q: How to build the frontend production version?
A: Use the command pnpm run build to build the frontend production version.
Q: How to deploy to production environment?
A: Use the ./deploy.sh script for one-click deployment to production environment.
ℹ️ Help
For more details, please check the Official Documentation
👥 Contributors
🙏 Special Thanks
Thanks to the contributions and support of the following open-source projects:
🎨 Community
| Group QR Code | WeChat Pay QR Code |
|---|---|
 |
 |
❤️ Support the Project
If you like this project, please give it a ⭐️ Star to show your support! Thank you very much!